

In the past, I’ve always thought ice fishing needed a proper auger. I never thought that gas augers would be replaced by electric augers. Then electric augers were such a hit that retailers effectively stopped selling gas augers. I love my Strikemaster Lithium 40v that I purchased back in 2019 and it’s still going strong to this day. However I wanted to explore cordless drills. I once borrowed a setup from a buddy and discovered that it was actually quite nice. It cut well and was very portable. I decided I wanted to get my own.
So for part of last season and this season, I’ve been using my cordless drill setup every time I needed to use 8” holes. The popularity of cordless drills augers have risen quite a bit in recent years so it definitely works. In this post I will go over why you should get a cordless drill auger and how you can make a setup.
Why You Should Get a Cordless Drill Auger
The first thing that comes to mind is cost. The cordless drill itself is actually fairly expensive and almost comparable to an ice auger powerhead. Though a cordless drill provides a lot more utility outside of fishing. If you’re a hardcore angler, stuff breaks and chances are a cordless drill is being used. If you’re a tradesperson, you likely already have the drill already and all you need is a bit. A cordless drill is also useful on the ice as well for drilling ice anchors into the ice quickly with the proper adapter.
The advantage on the ice is the portability. There are times where I do not have the luxury of winter vehicles and I have to hand pull my gear. In the past I had to haul my 40v while isn’t ultra heavy, it does weigh something like 28lb and takes up a lot of space in the little toboggans. My drill setup uses a 8” Strikemaster Lite-Flite that likely combined is less than 10lb. This may not be too significant for short walks but I often go on trips that involve long hikes. I hand hauled gear on 5km round trip and honestly every bit of weight that could be shed should be eliminated.
On the ice itself, the weight savings is pretty significant when hole hopping. Carrying the 40v was hard with one hand but the drill setup was basically a feather in comparison. Especially in the forward facing sonar era, sniping is very common and being able to carry the drill and sonar setup is pretty nice. I definitely enjoy using that setup as unless I really need the 40v which we will talk about later.
Building the Setup
So you’re likely convinced that you want a cordless drill setup at this point. I too had to do a lot of research before I came upon my setup.
The Drill
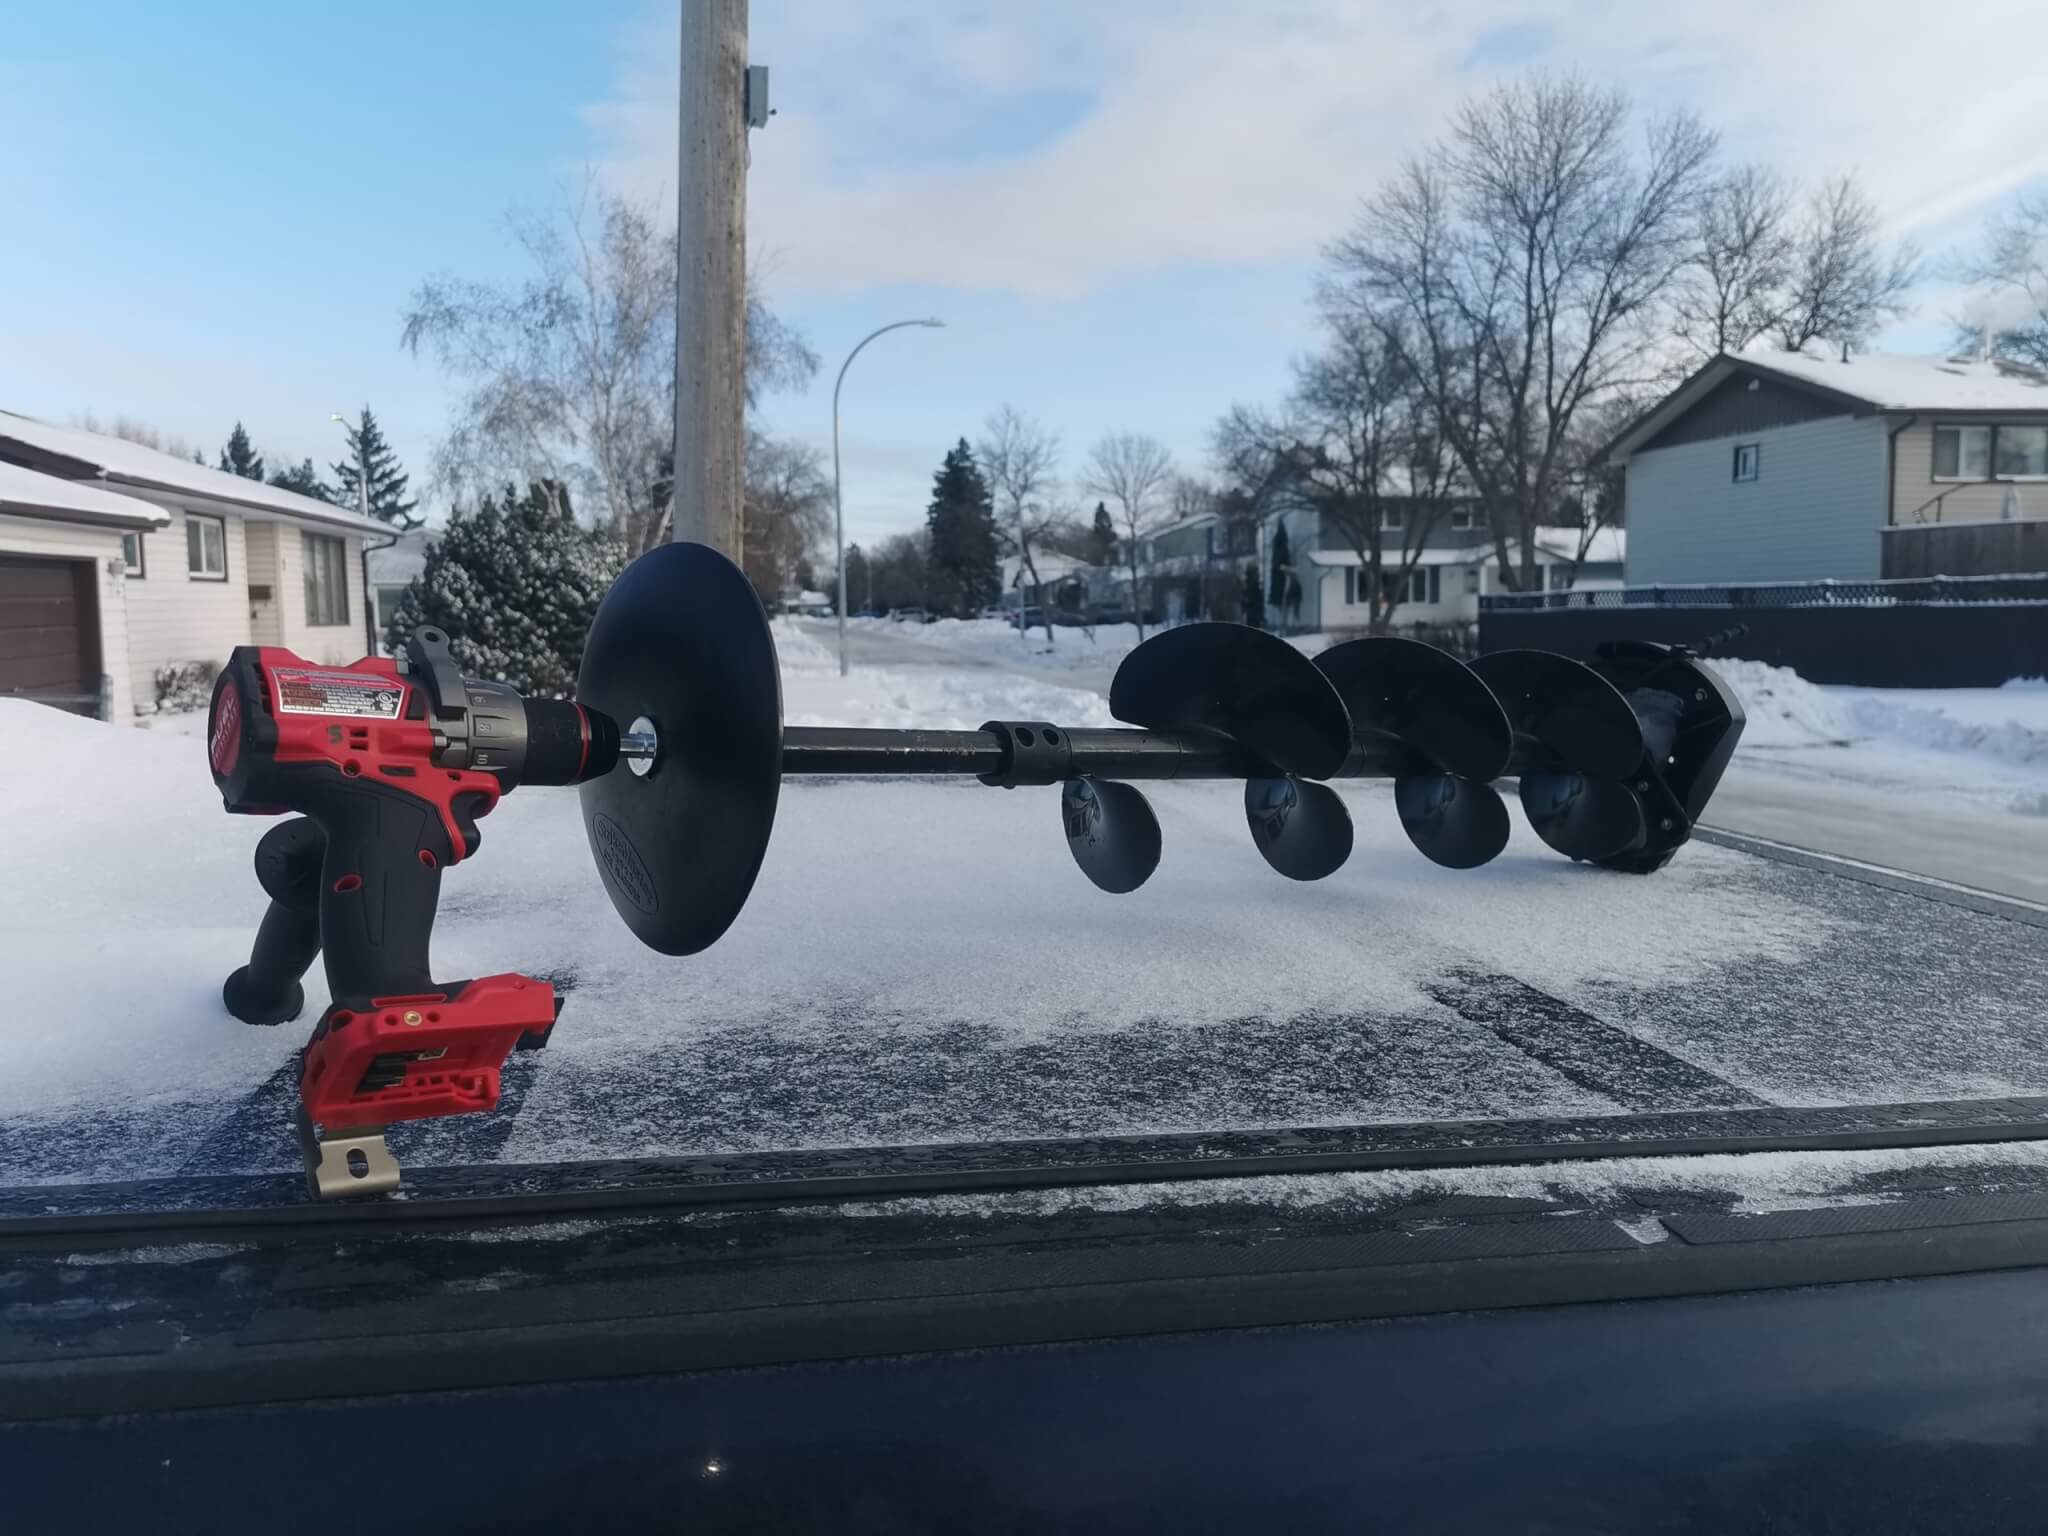
Drilling through ice is not trivial so it’s critical to use the right tool otherwise you’re looking at a burned out tool or failure to punch a hole. For the Strikemaster Lite-Flite (I will refer to this as this is what I own), Rapala recommends that a quality 18v brushless drill is to be used. The rule of thumb is that you need 100 inch pounds for every inch of the diameter of the hole. Most people here need a 8” hole minimum so do the math.
The Milwaukee M18 Fuel is what I personally use and is highly recommended for having 1400 inch pounds of torque. Though any drill with similar specifications should work as well. I’m not a tradesperson so my knowledge of power tools isn’t the greatest but this drill has worked very well for cutting ice. As these are high torque drills, it’s critical that it has some sort of handle for support.

In terms of batteries, I’ve been bringing two 6ah batteries. Now I can’t really say how many holes can be drilled on a battery but I have yet to kill the first battery so far. The most taxing trip I’ve taken it on involved about 15 holes through 3-4’ of ice and I was far from killing the battery. That would typically be an above average amount of holes for me. Obviously the bigger the batteries, the more holes you can drill. If you’re hardcore running and gunning, it may be worth considering larger batteries.
The Flyte
I’ve been referencing the Strikemaster Lite-Flite a lot in this post as it is what I own. I originally bought it as a secondary flyte to make smaller holes but I realized that it could be used with a cordless drill. A popular alternative would be the Eskimo Pistol Bit which has many similar properties. Usually these packages include an adapter to be used with the drill and a safety plate that will prevent the flyte from falling into the water should it come loose from the drill.
There is also the Clam Drill Plate adapter that some people use have a bit more of a traditional auger feel. Some people really like this though I personally I have no issues with the drill directly attached so far though.
The Limitations
I love the drill setup but there’s a reason I still keep the 40v around.
In the end, the 40v handles 10 inch holes far better. If you do the calculations, a 10” hole needs to displace far more shavings than an 8” which necessitates a more powerful auger. If you’re serious about fishing, you definitely need a proper auger.
Volume of a cylinder: V = π(r^2)(h)
V = amount of shavings to be displaced
r = radius of hole
h = depth of ice (20 inches)

8 inch hole shavings
3.1459*(4^2)*20=1,006.688

10 inch hole shavings
3.1459*(5^2)*20=1,572.95

Approximately 44% difference (I just plugged it into a percent difference calculator online)
As you can see, even though the sizes of the holes aren’t that different, the amount of shavings is actually pretty significant.
I often fish for northern pike which potentially may require a 10 inch hole. Sure it could fit in a 8 inch hole but I don’t like those chances. Plus I also target lake trout and sometimes even sturgeon. So yes the 40v is still staying with me. It is very nice to have two augers though should one fail, especially on a long trip.
Final Words
Hopefully this post has convinced you that cordless drill augers are indeed valuable and should not be underestimated. For the casual angler, it can be the primary auger but even as an experienced angler it’s a good supplemental tool. Do your research and invest in the right equipment the first time.
![[VIDEO] First Ice Pond Trout](https://i0.wp.com/fishingprairieandshield.com/wp-content/uploads/2025/12/first-ice-pond-trout.jpg?resize=319%2C142&ssl=1 "[VIDEO] First Ice Pond Trout")
![[VIDEO] Frostbite Winter Whitefish Challenge](https://i0.wp.com/fishingprairieandshield.com/wp-content/uploads/2026/03/wp-17731063555599187704628016343422.png?resize=319%2C142&ssl=1 "[VIDEO] Frostbite Winter Whitefish Challenge")
![[VIDEO] Manitoba Backcountry Crappie Fishing](https://i0.wp.com/fishingprairieandshield.com/wp-content/uploads/2025/01/wp-17372613047811413118252913392448.jpg?resize=319%2C142&ssl=1 "[VIDEO] Manitoba Backcountry Crappie Fishing")